Complete both your immigration and customs sections on Visit Japan Web before your flight. After both are done, the service generates a single unified 2D code you'll scan at the airport — having it ready means you can skip the paper forms.
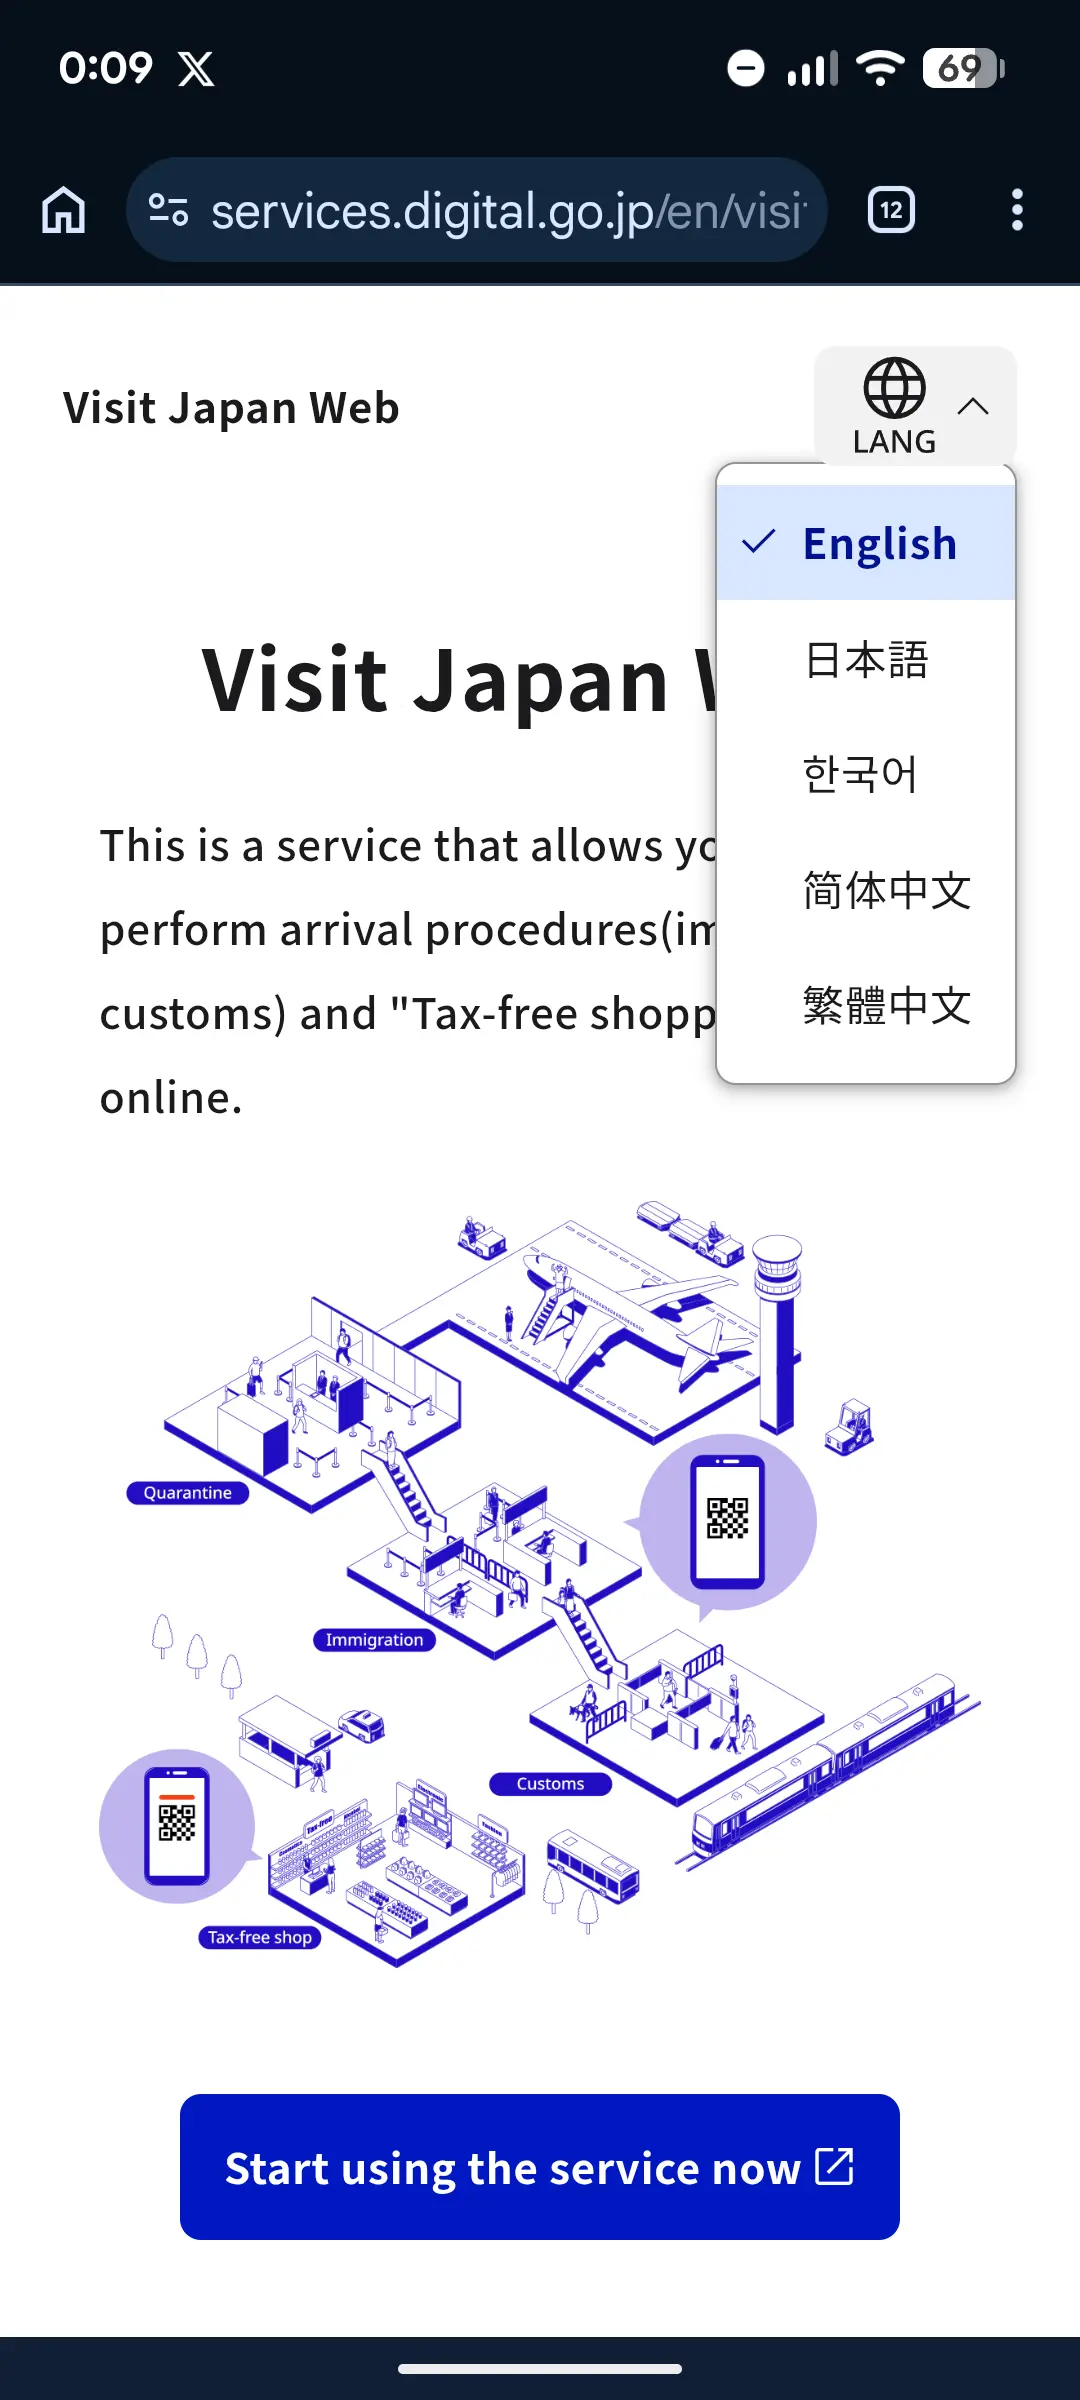
If you're traveling to Japan, you've probably seen "Visit Japan Web" mentioned somewhere. It's a free online service from the Japanese government that lets you complete your arrival procedures — immigration, customs, and tax-free shopping registration — before you even board your flight.
This guide walks you through the entire process step by step, so you can get it done in about 15 minutes.
What Is Visit Japan Web?
Visit Japan Web is the official online service operated by Japan's Digital Agency. It bundles three different arrival-related procedures into one account:
- Immigration entry information (replaces the paper disembarkation card)
- Customs declaration (replaces the yellow paper customs form)
- Tax-free shopping registration (used at participating retailers — a separate QR from the entry code)
For the first two — immigration and customs — Visit Japan Web generates a single unified 2D code that you scan at the airport. Since January 25, 2024, immigration and customs share the same code; older guides that mention separate "blue" and "red" QR codes are out of date.
For tax-free shopping, Visit Japan Web generates a separate QR code that you present at participating stores. This guide focuses on the entry 2D code; for the tax-free side, see Japan Tax-Free Shopping Guide 2026.
At busy airports, the unified 2D code can save significant time on arrival — primarily because you skip the paper forms and can use the electronic gates where available. Actual time savings depend on airport, hour, and how busy your flight is.
Who Should Use It
Visit Japan Web is available to all travelers entering Japan, including:
- Foreign tourists (visa-free and visa holders) — not sure if you need a visa? Check with our Japan Visa Calculator
- Japanese nationals returning from abroad
- Foreign residents with re-entry permits
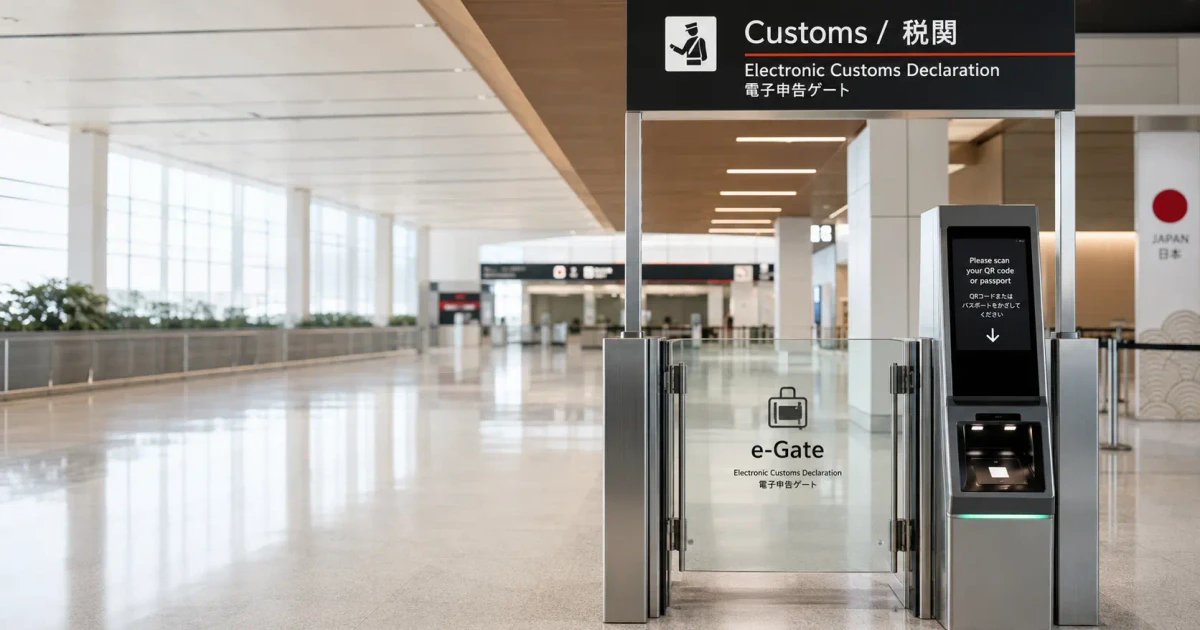
It's technically optional (you can still use paper forms on every flight), but it's strongly recommended by the Japanese government. The electronic customs declaration gates (e-Gates) at the major international airports are designed around Visit Japan Web — without the 2D code, you'll be routed to the manned counter.
What You'll Need
Before you start, gather:
- Valid passport (you'll enter your passport number, expiration date, etc.)
- Flight details (airline, flight number, arrival date and airport)
- Accommodation address in Japan (hotel name and address; booking confirmation is fine)
- Email address (for creating your account)
- A device with internet (phone, tablet, or computer)
Step-by-Step Registration
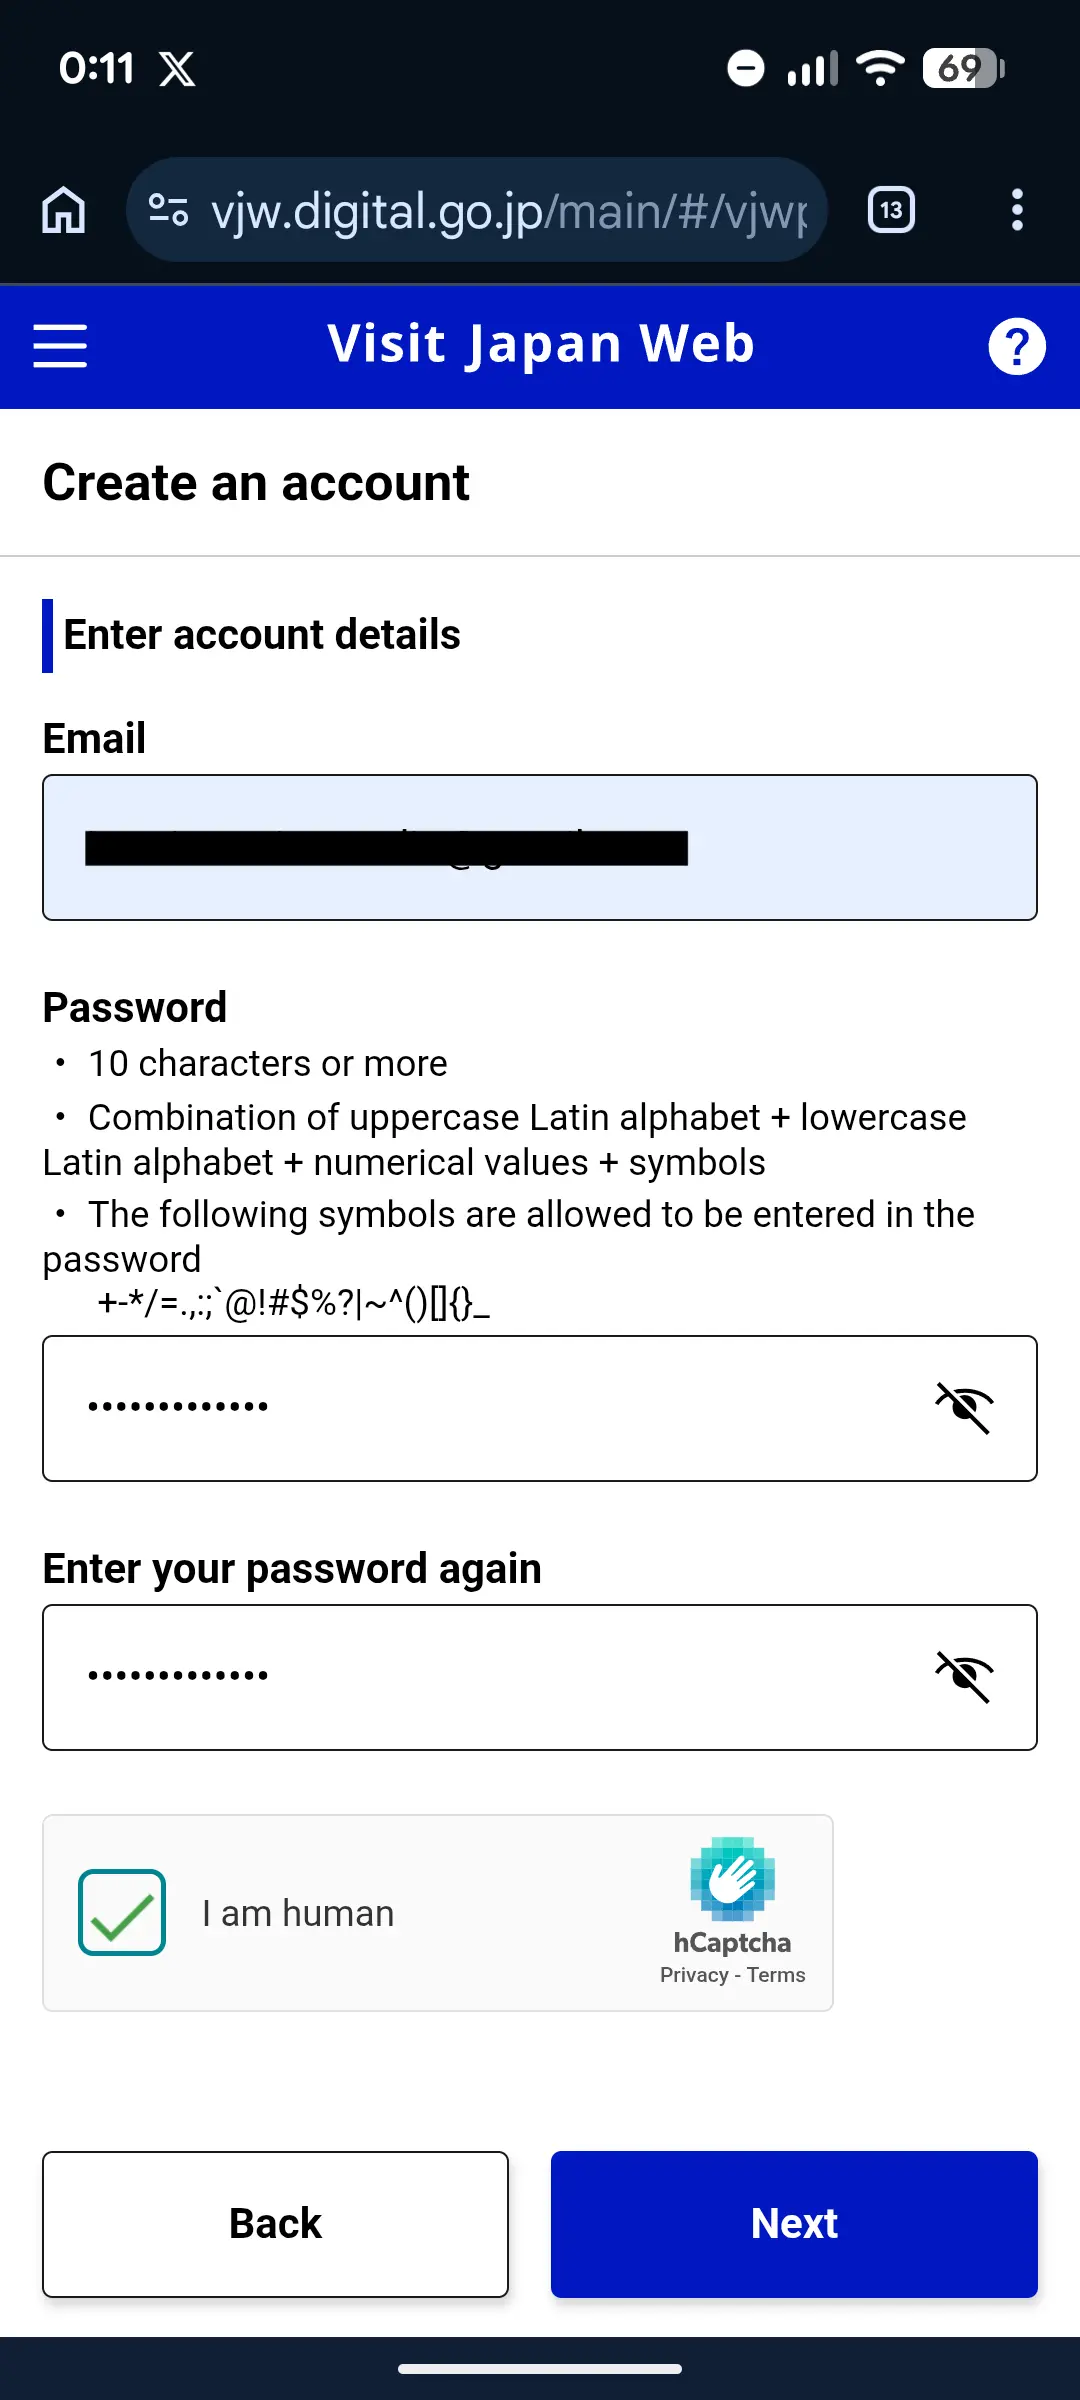
Step 1: Create Your Account
Go to the official Visit Japan Web site at vjw.digital.go.jp and tap "Create a new account".
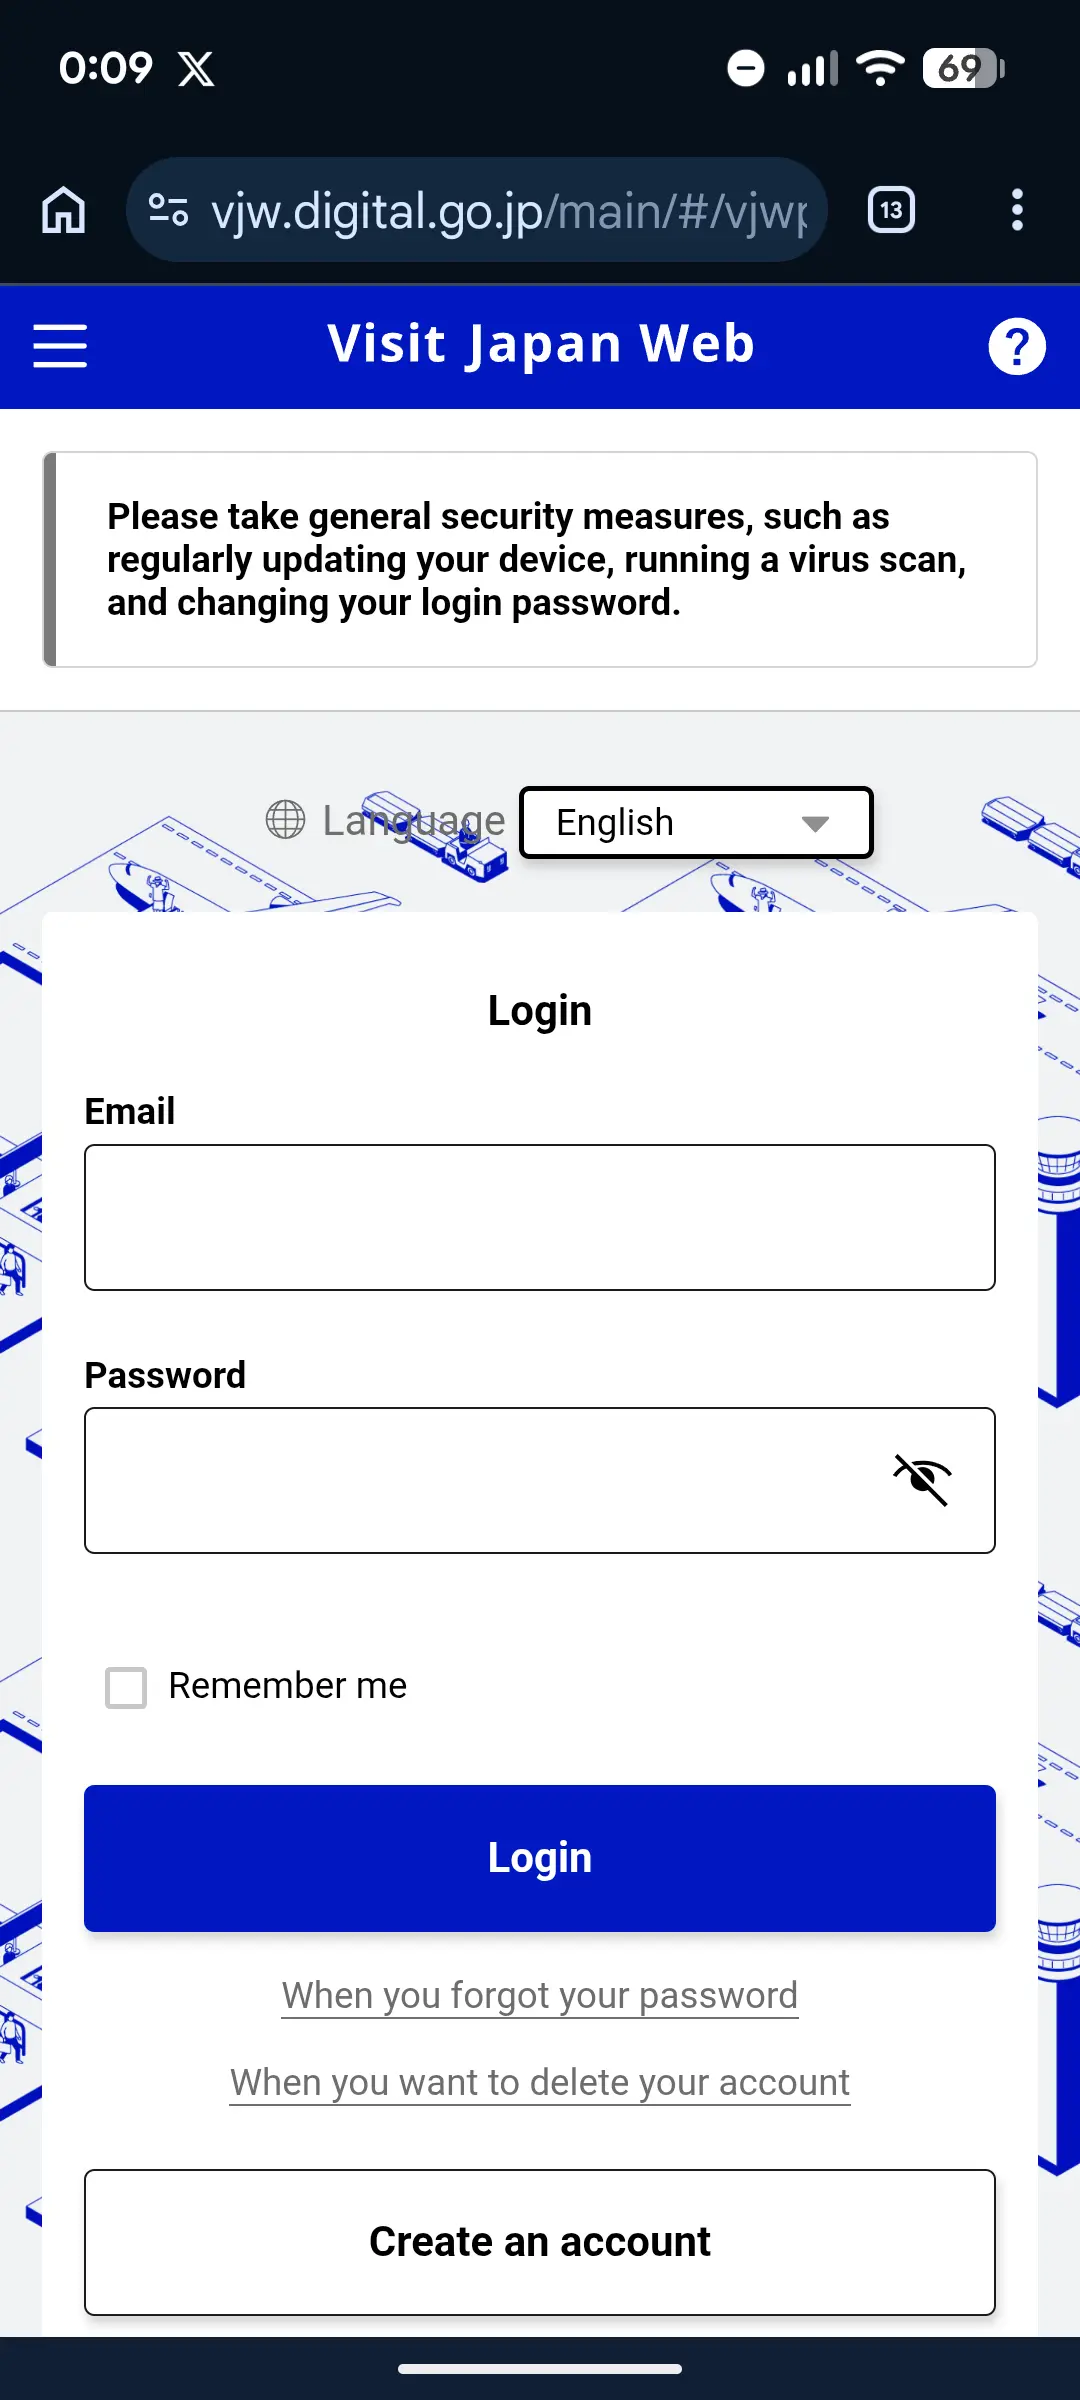
- Enter your email address
- Create a password — at least 10 characters, including uppercase, lowercase, numbers, and symbols
- You'll receive a verification code by email — enter it to activate your account
- Fill in your basic personal information (name as shown on passport, date of birth, nationality)
After your account is active, you land on the dashboard. From here you'll register your trip and your traveler details.

When you enter your passport details, double-check the passport number, surname, and given name against the photo page of your passport.
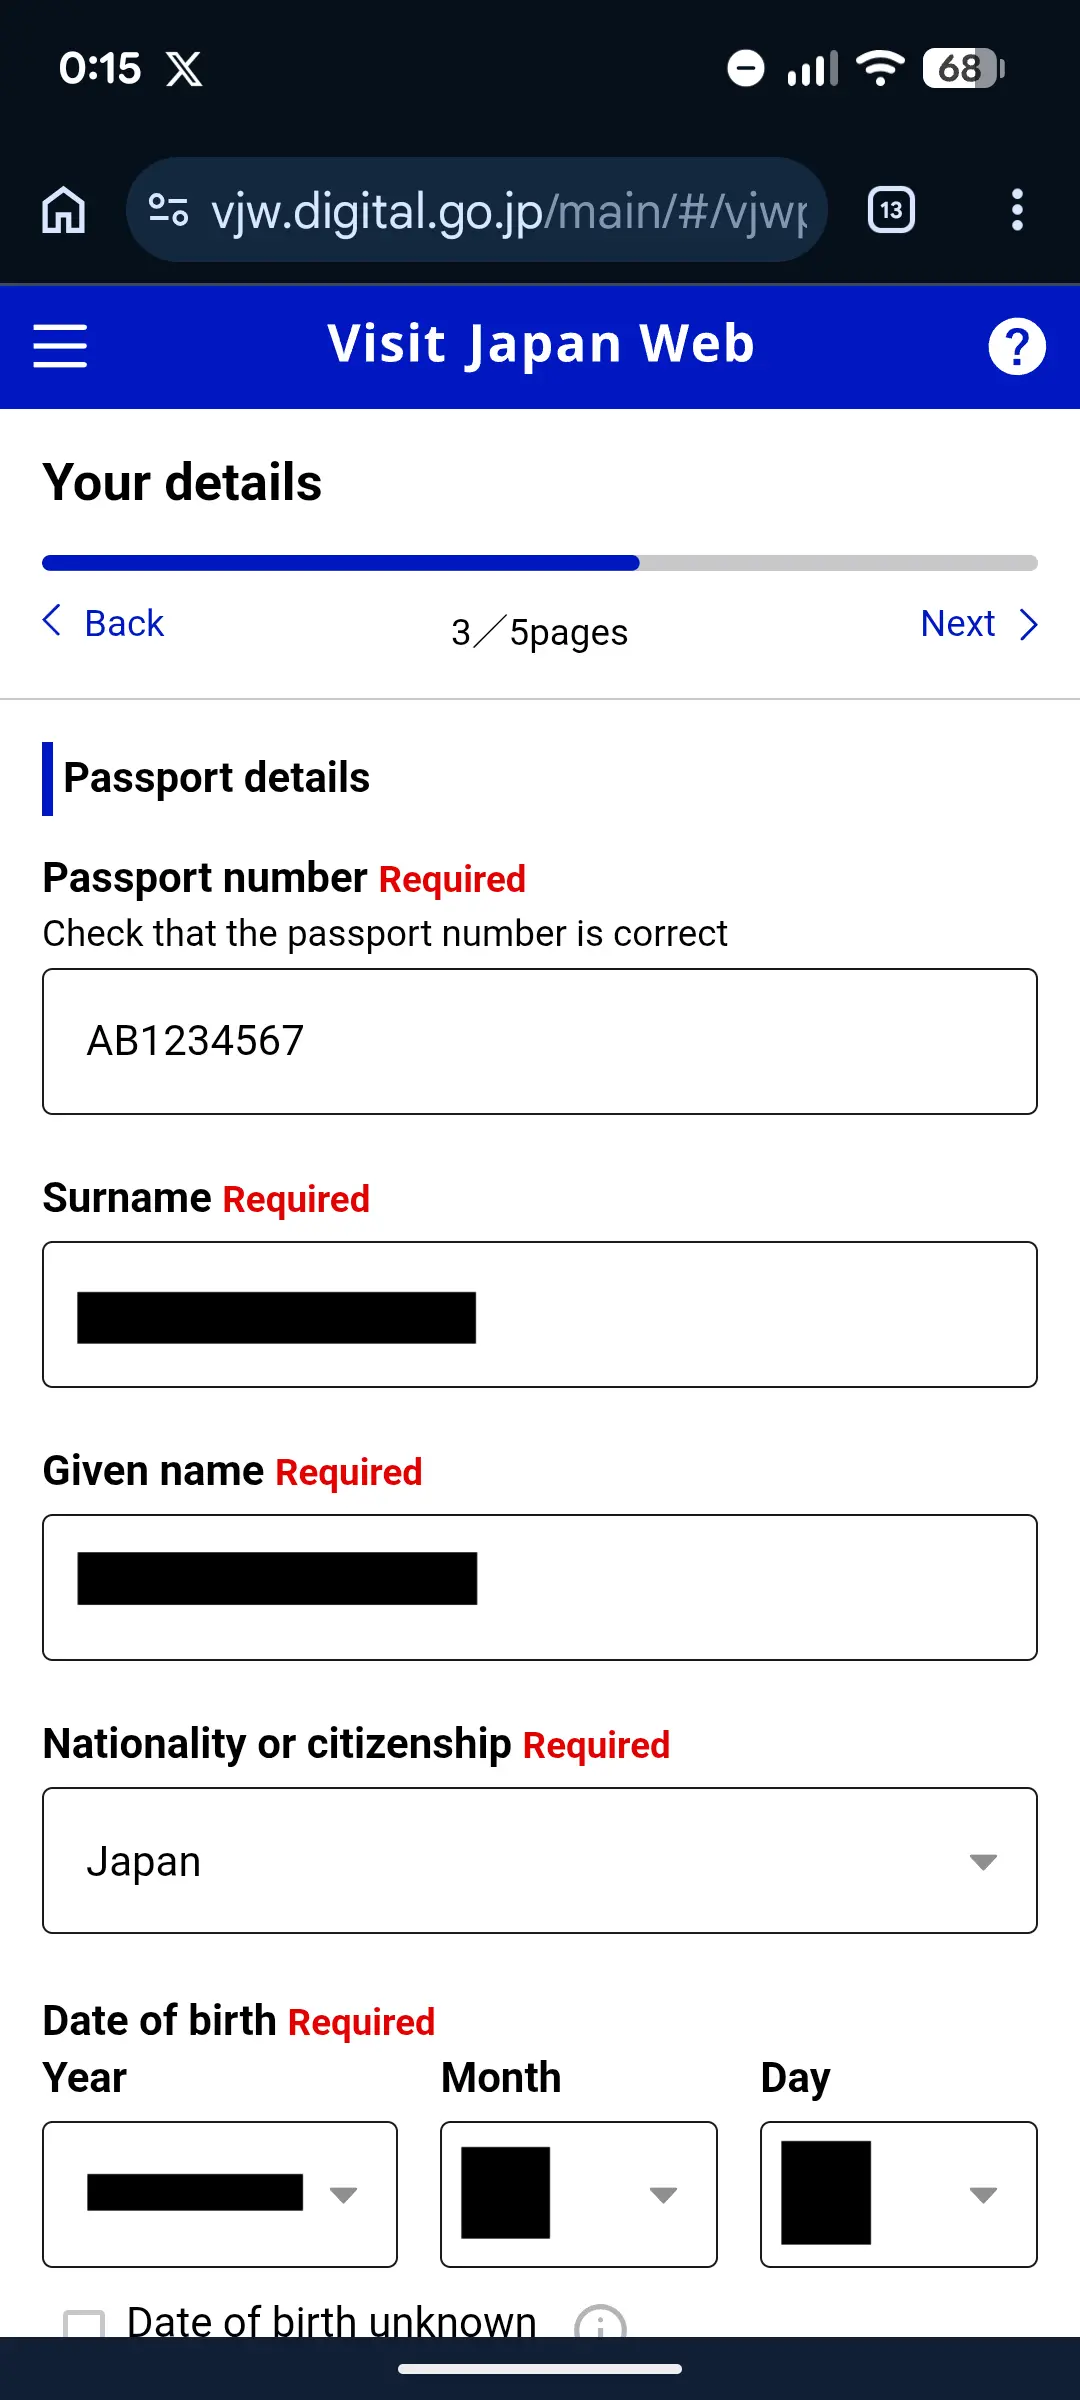
Use the exact same name that appears on your passport, in the same order. If your passport says "SMITH JOHN MICHAEL", enter it exactly that way. Mismatches at the Machine Readable Zone (the two lines of text at the bottom of your passport photo page) cause problems at immigration.
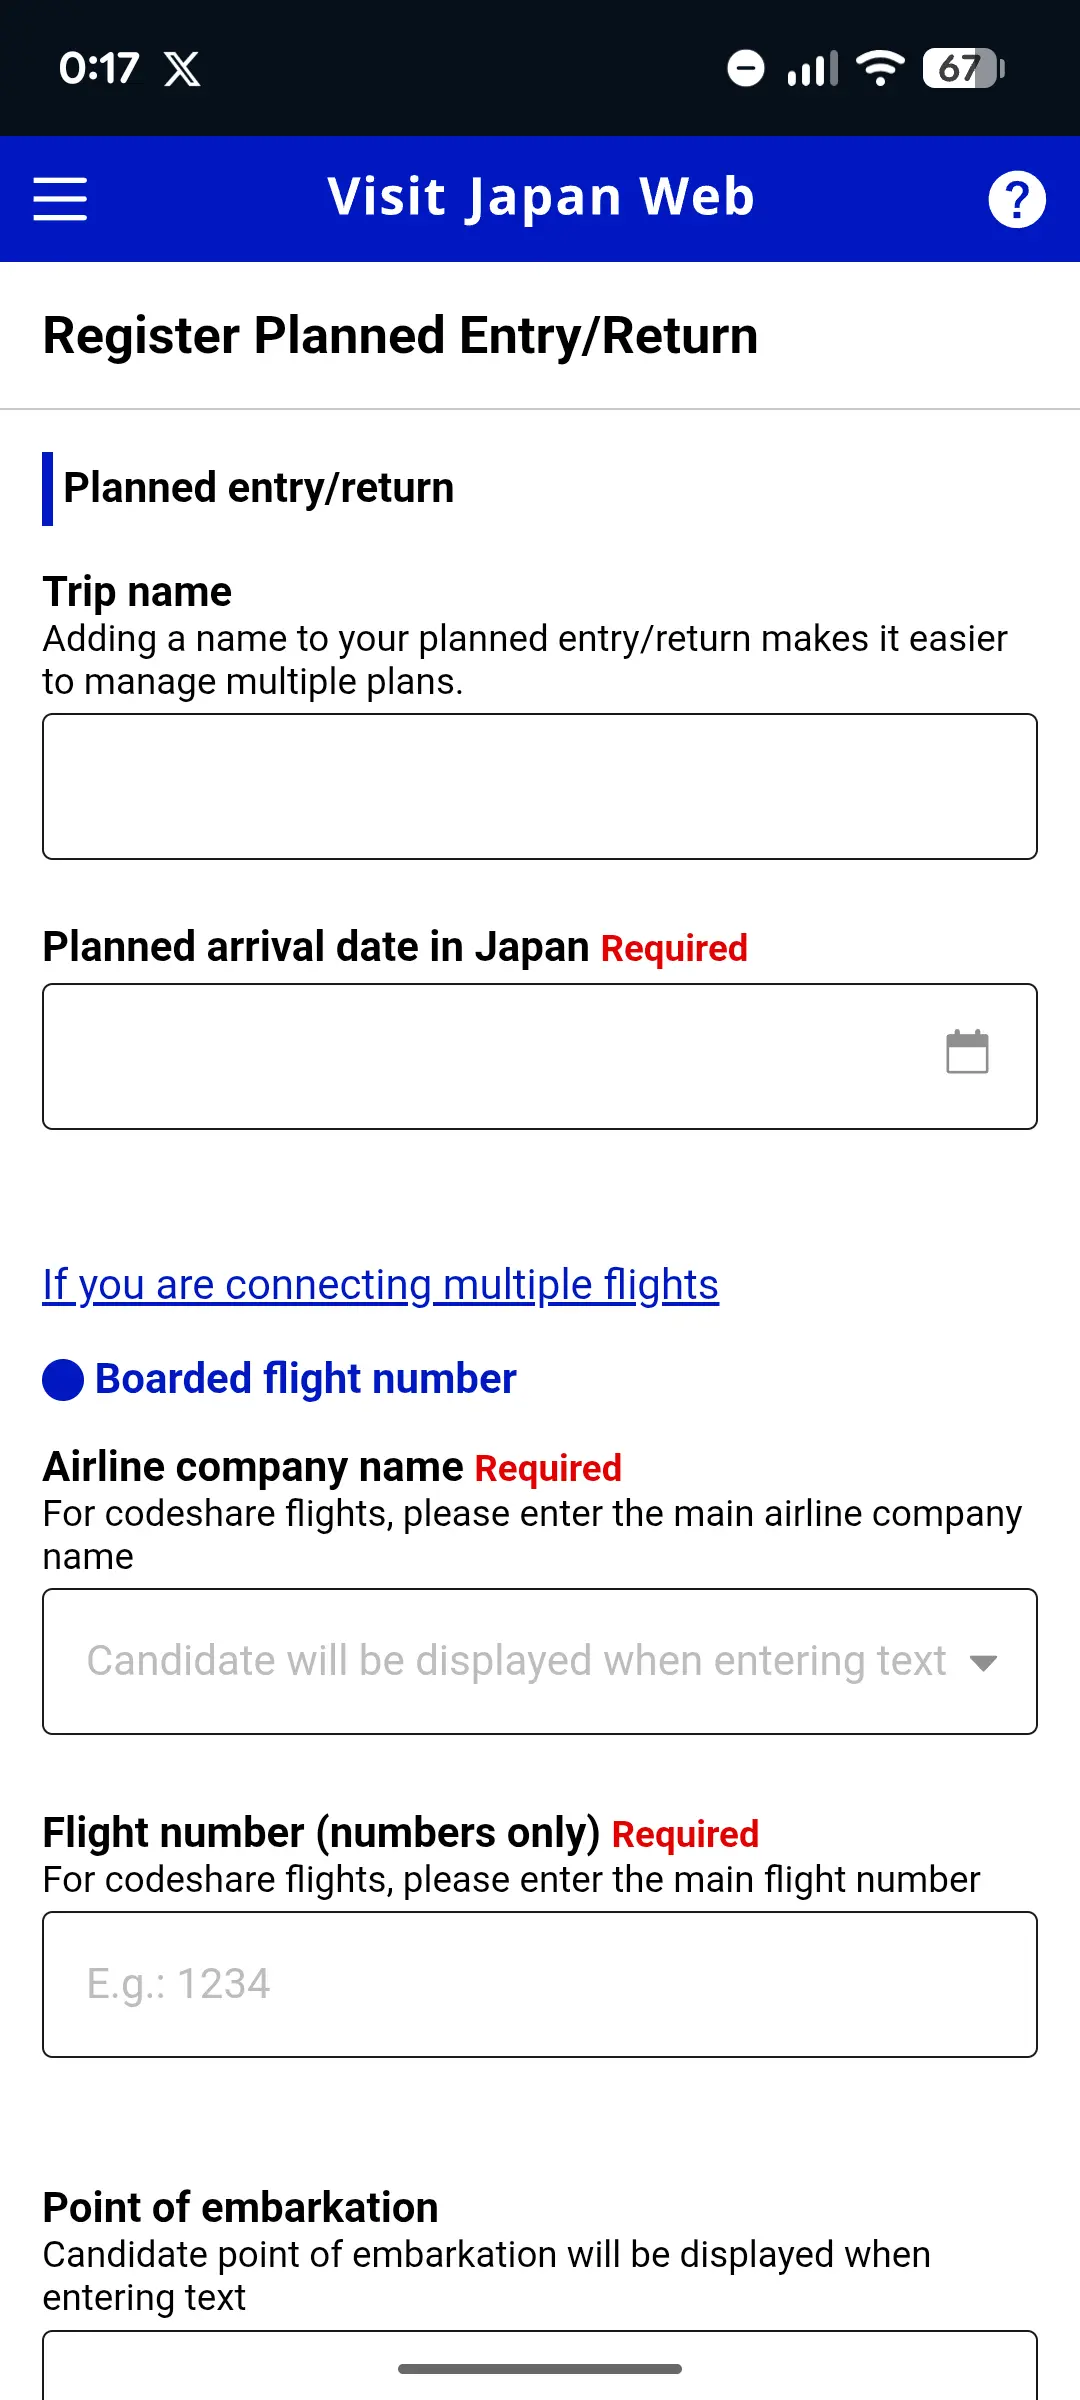
Step 2: Register Your Trip
Once logged in, tap "Register New Trip" and enter:
- Arrival date in Japan
- Airline name and flight number (e.g., ANA NH104)
- Airport of arrival (Narita, Haneda, Kansai, etc.)
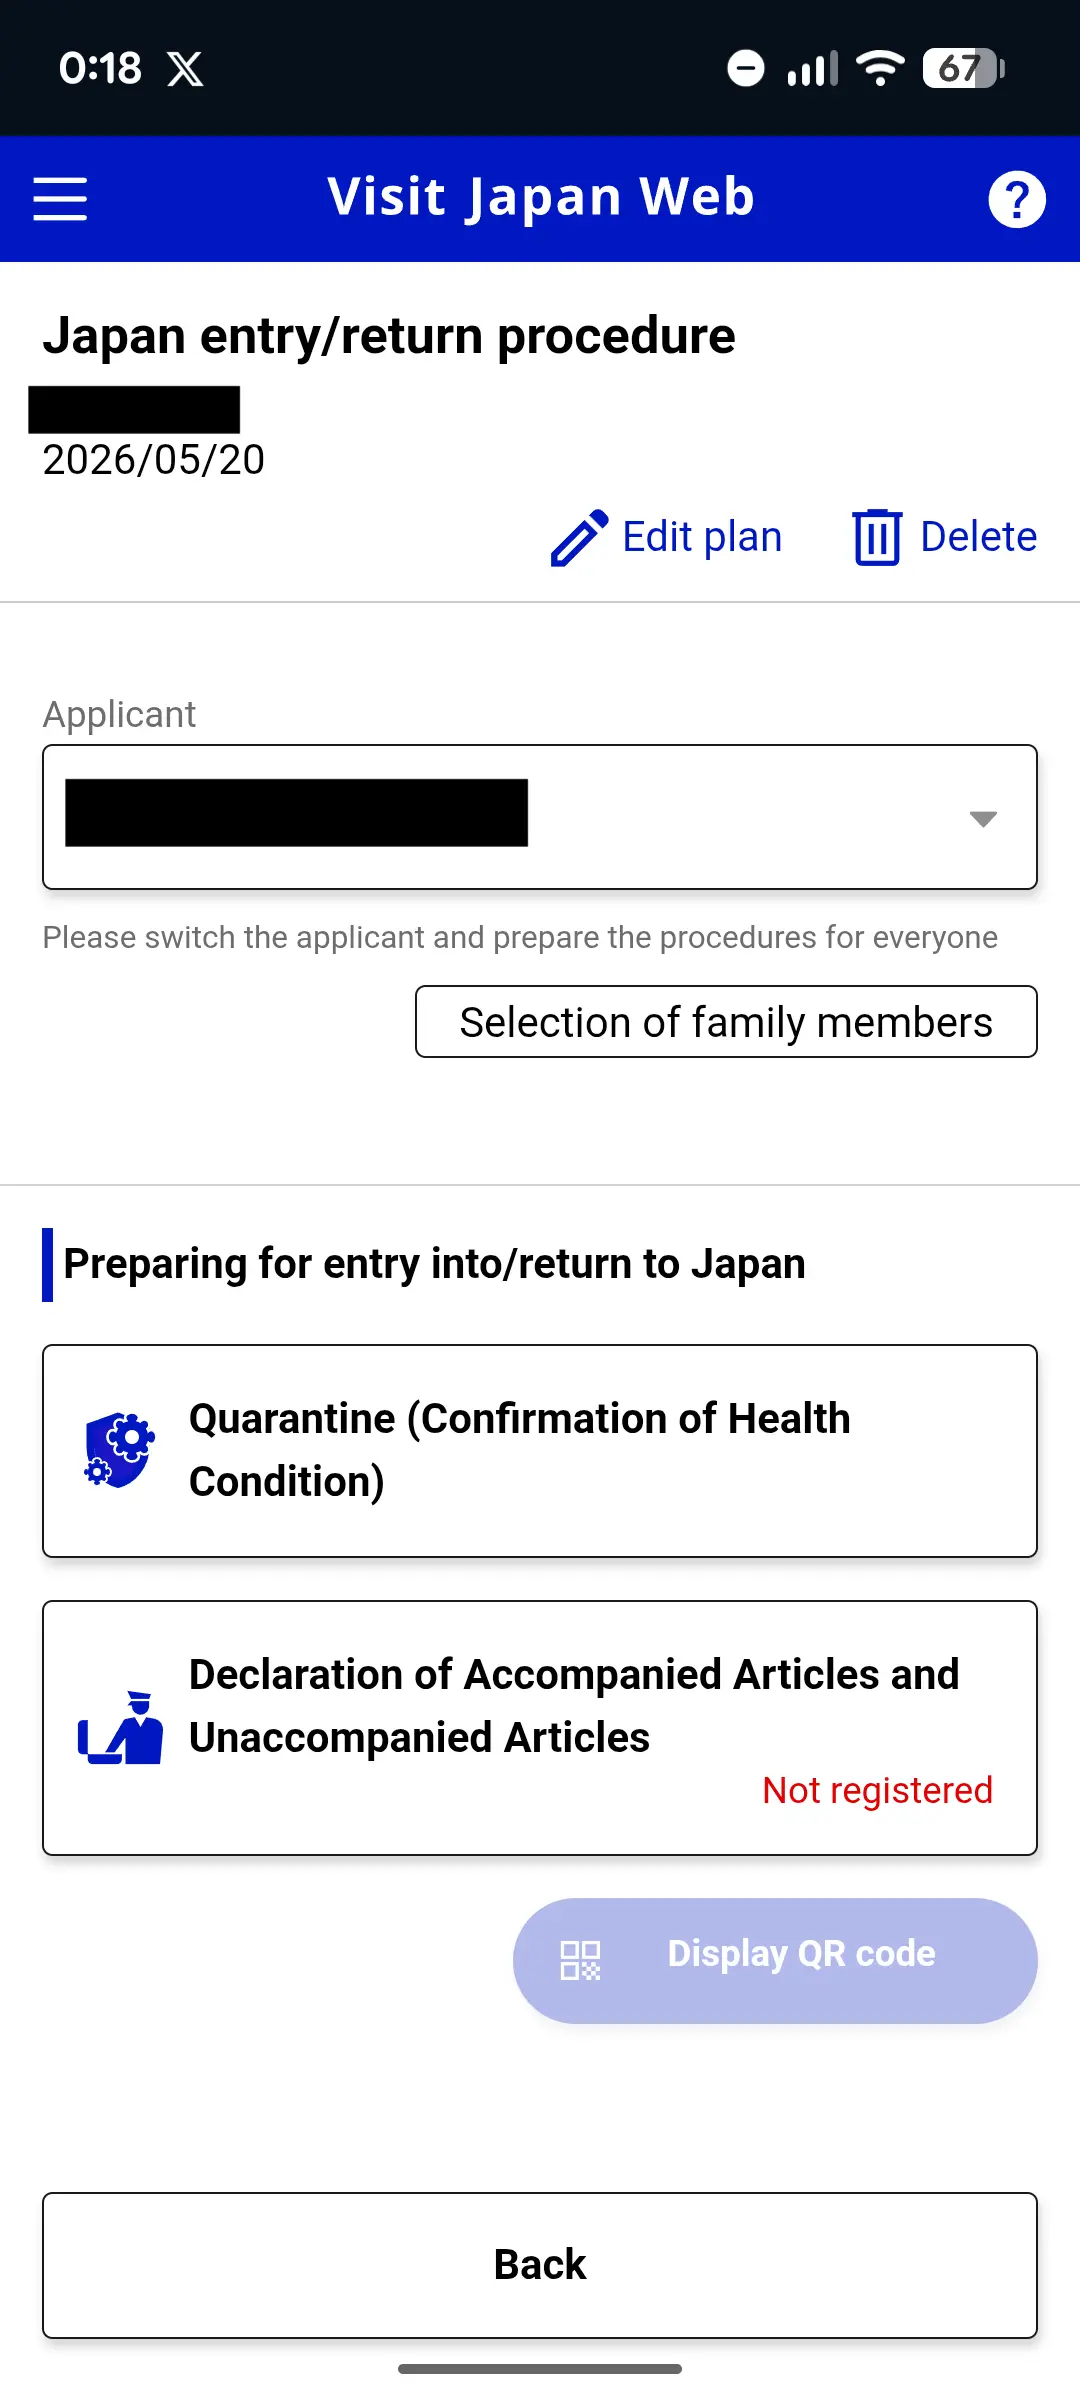
Step 3: Complete the Immigration Section
After your trip is saved, you'll land on the entry/return procedure hub. This is where the Quarantine and Customs sections both live — under the same trip, accessed from the same screen.
This replaces the paper "Disembarkation Card" you'd normally fill out on the plane. You'll provide:
- Purpose of visit (tourism, business, etc.)
- Intended length of stay
- Accommodation in Japan (hotel name, address, phone number)
- Country/city from which you're departing
- Standard security questions (criminal history, drug offenses, etc.)
Review your answers carefully and submit.
Step 4: Complete the Customs Section
In the same account, complete the customs declaration. The customs form runs across about 10 short pages of yes/no questions. You'll be asked about:
- Items you're bringing into Japan (alcohol, tobacco, perfume, gifts, etc., where they exceed duty-free limits)
- Whether you're carrying over ¥1,000,000 in cash or financial instruments
- Whether you have any prohibited or restricted items
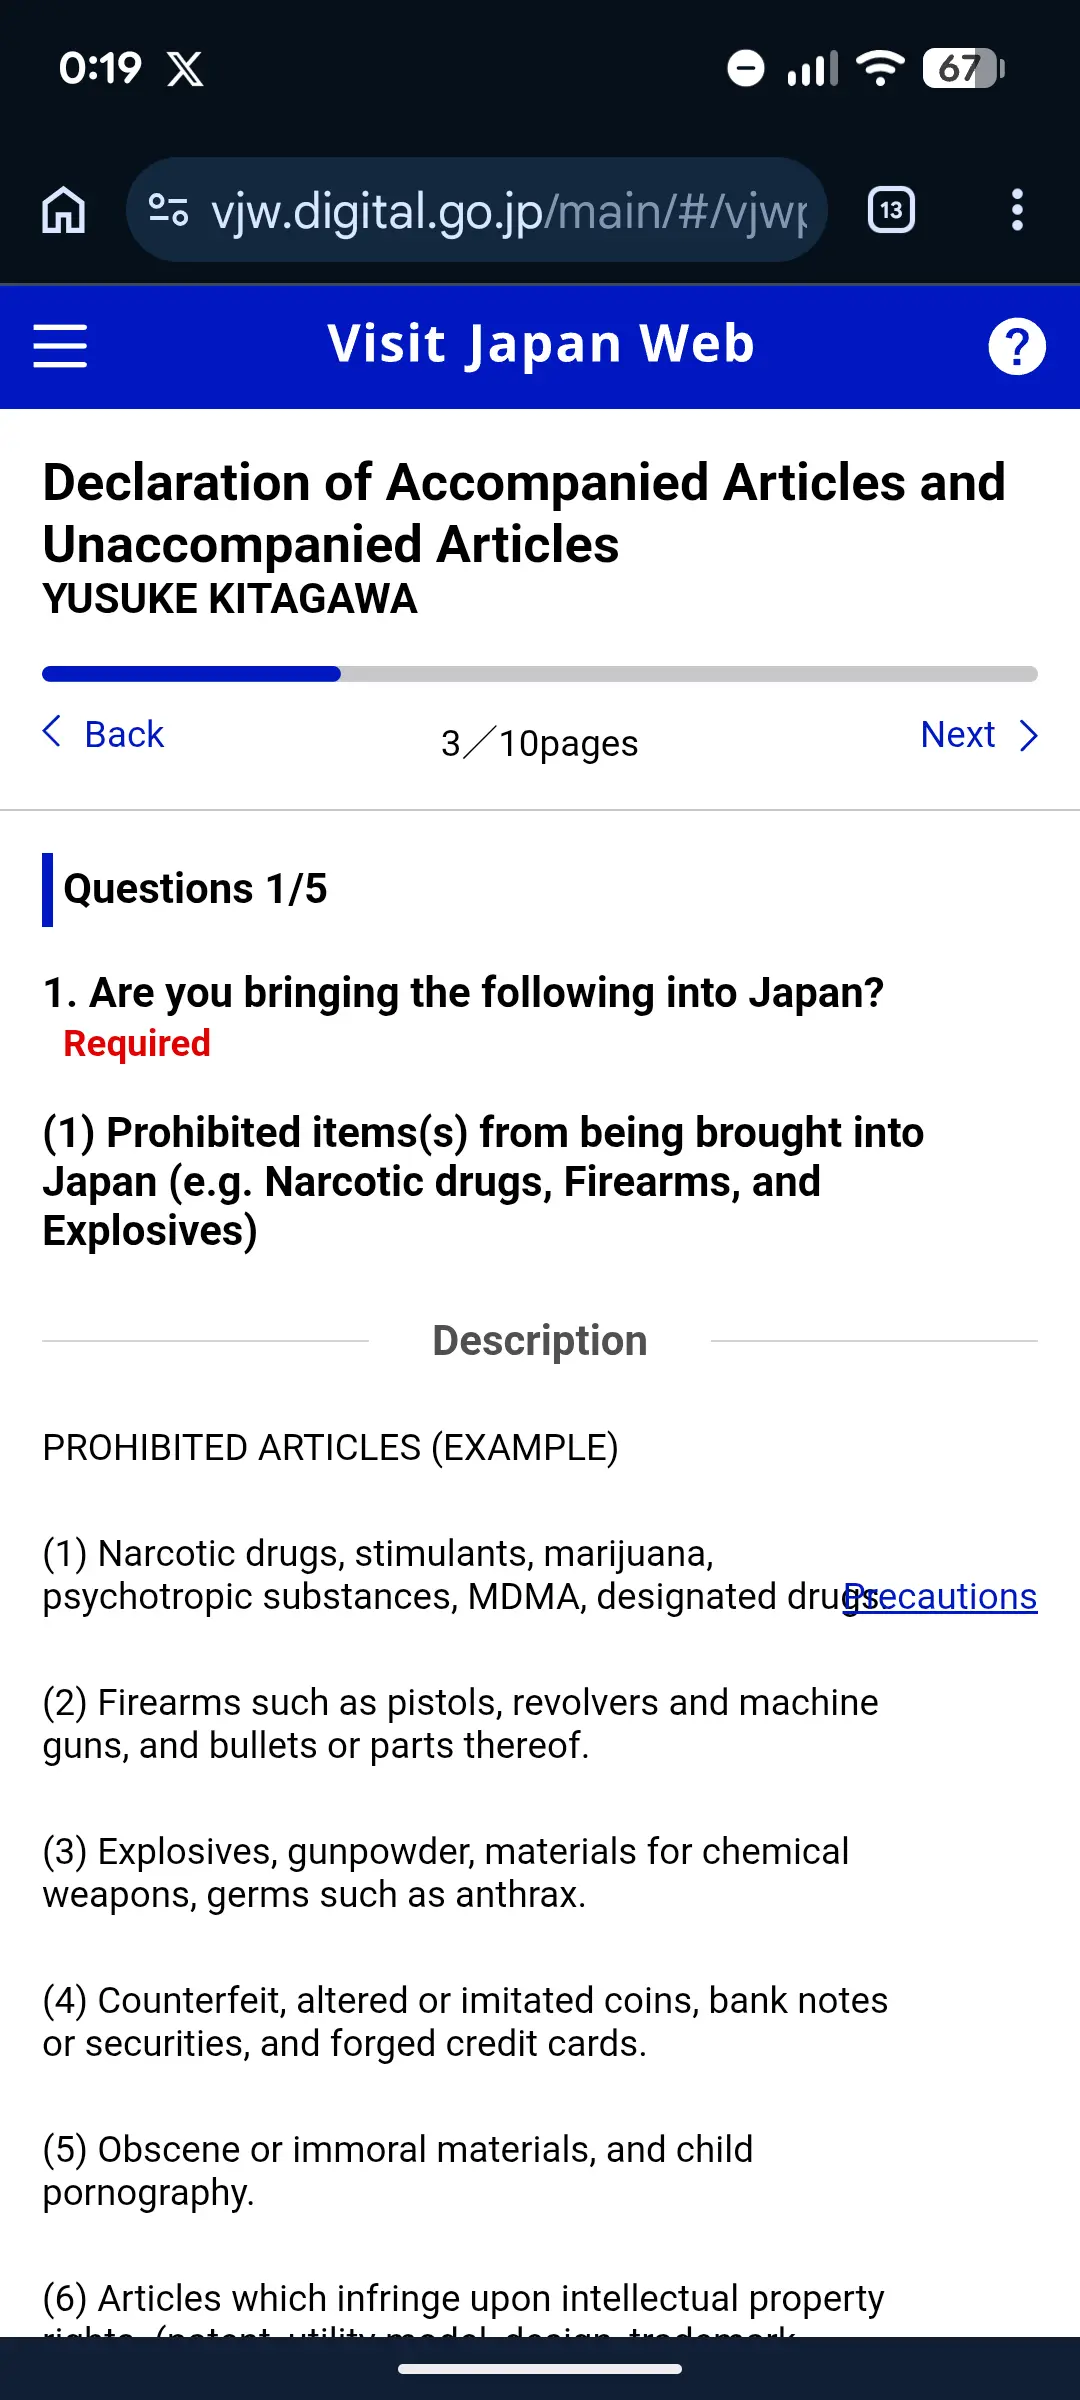
For most tourists with standard luggage, the answers are "No" across the board. For a deeper breakdown of duty-free limits, medication rules, and what gets you flagged at customs, see our Japan Customs Declaration Guide.
Step 5: Confirm Your Unified 2D Code
Once both immigration and customs sections are complete, tap "Display QR code" on the procedure hub. You'll see a short confirmation prompt before the code appears.
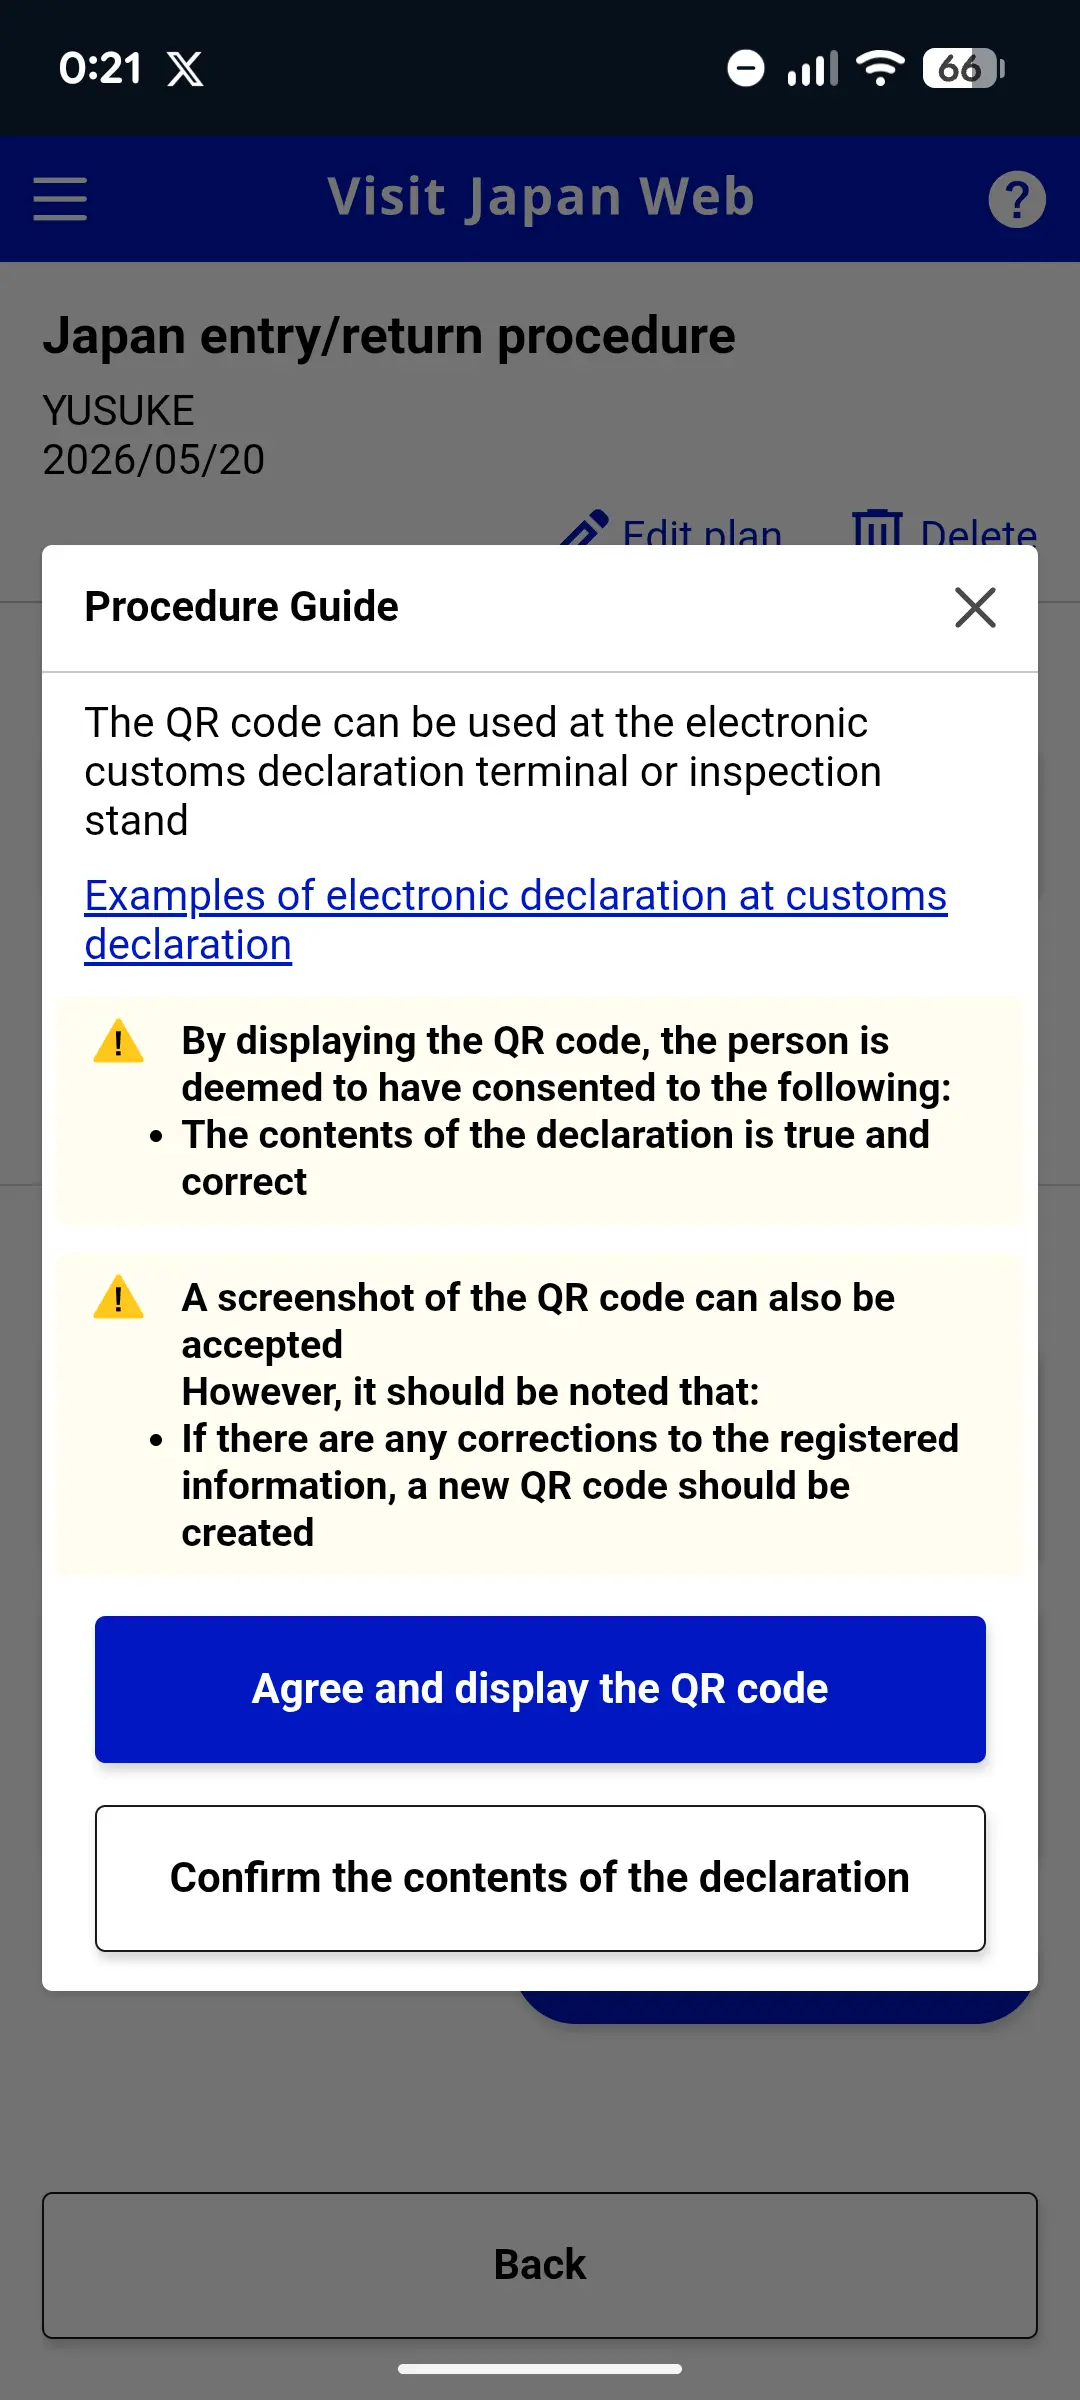
Visit Japan Web generates one unified 2D code for arrival procedures — not two separate codes. You'll scan the same code at immigration (passport control) and again at the customs e-Gate after baggage claim.
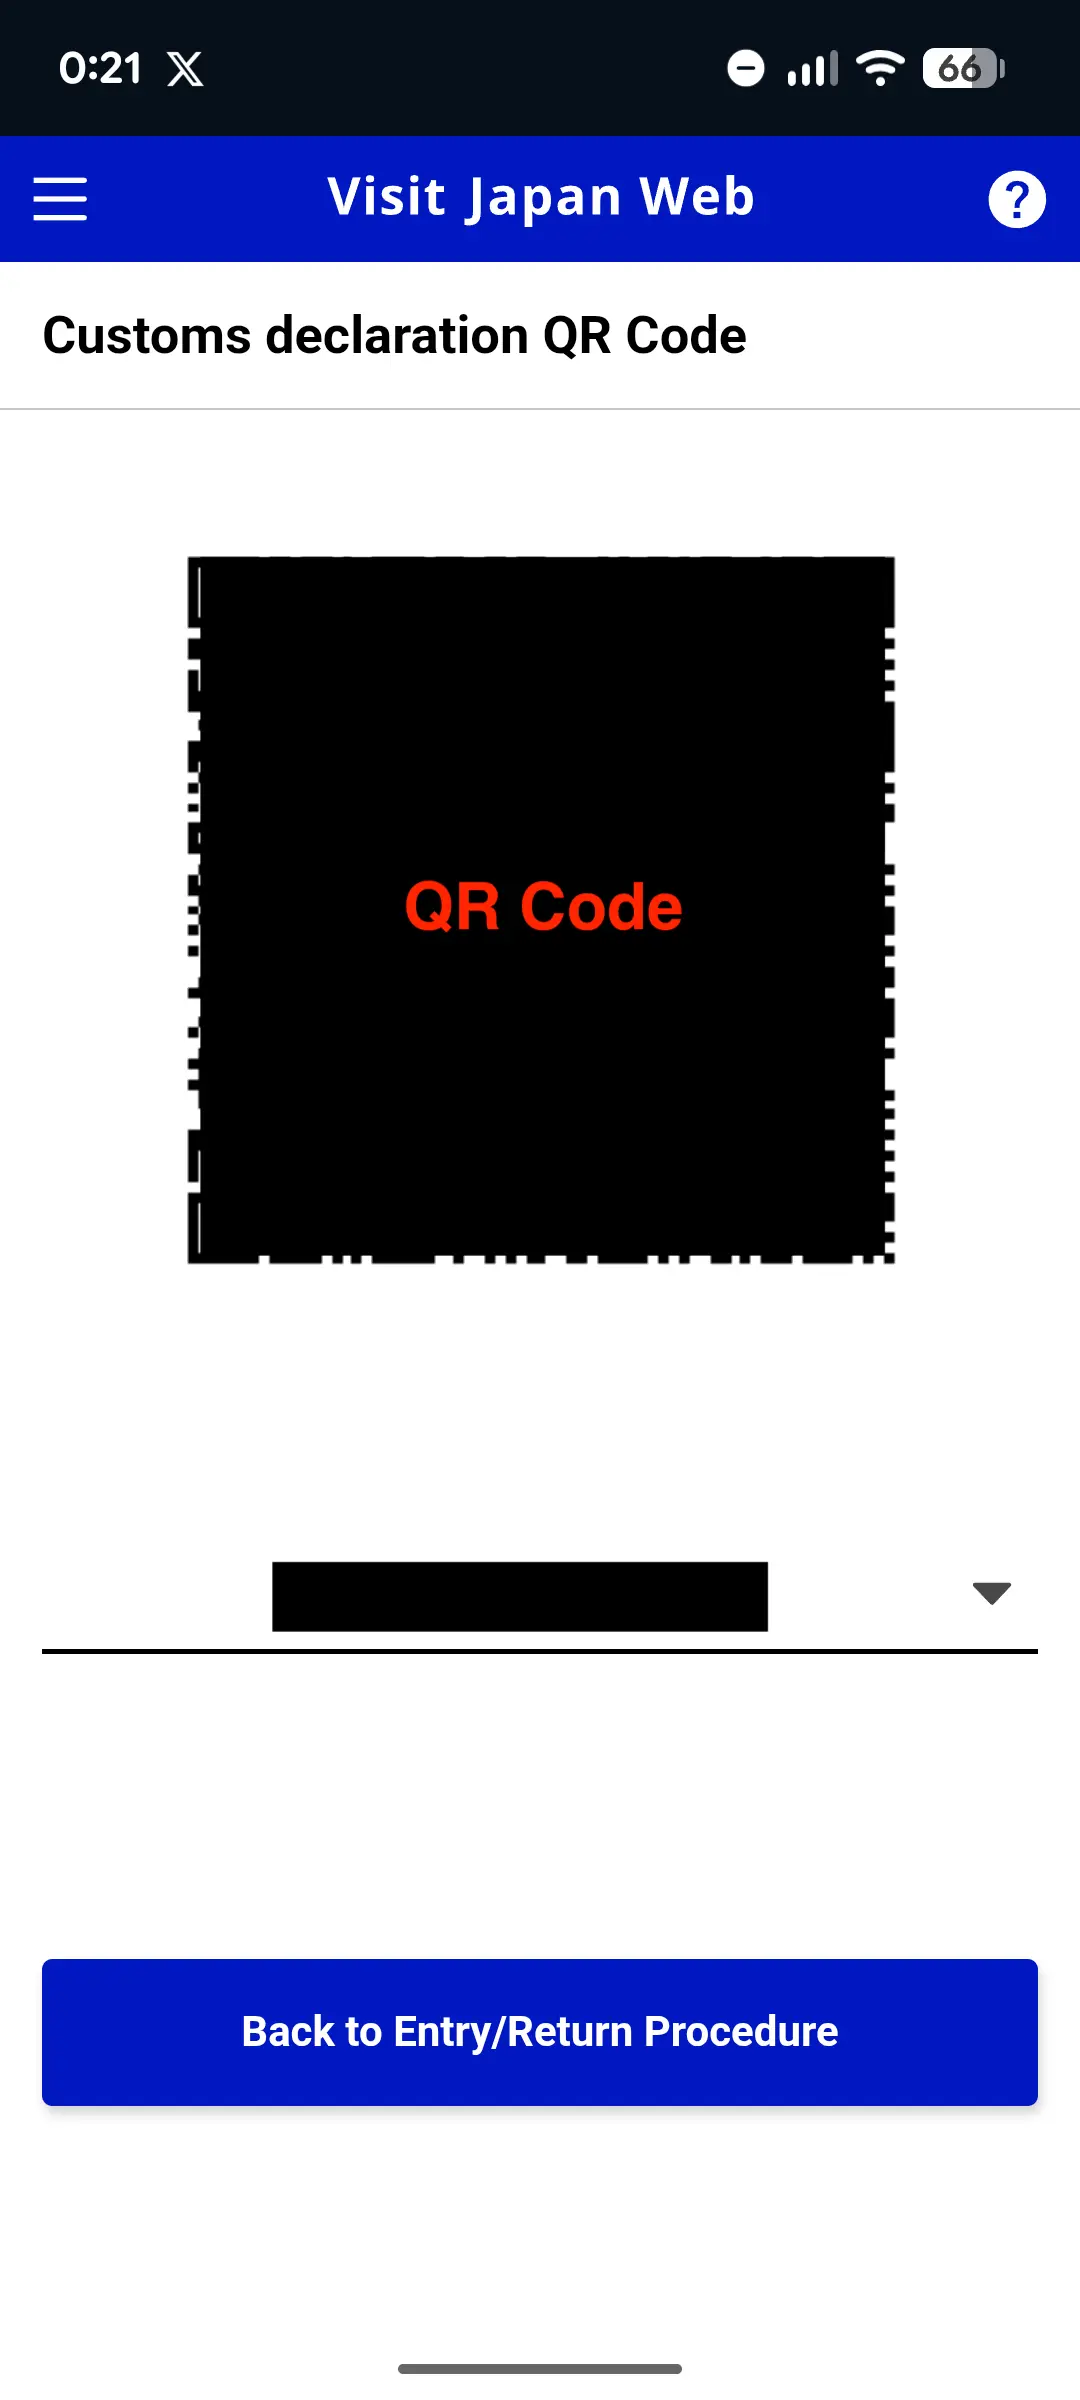
Take a screenshot of your unified 2D code and save it to your phone's photo library. Airport WiFi can be slow or unreliable right after a long flight, and having an offline backup means you don't depend on connectivity.
At the Airport: Using Your Unified 2D Code
The exact flow depends on which airport you arrive at.
Joint Kiosks (Integrated Immigration + Customs Terminals)
At Kansai International (KIX), Haneda (HND), and Narita Terminal 3 (NRT T3), there are integrated Joint Kiosks that process immigration and customs in a single transaction (as of April 2025). You:
- Approach a Joint Kiosk
- Scan your Visit Japan Web 2D code and your IC passport
- Follow the on-screen instructions (face recognition, fingerprints for foreign nationals)
- If you have nothing to declare, you can clear customs through the electronic gate by facial recognition; if you do, you'll be routed to a customs inspection counter
This is the fastest path through arrival when it's available.
Standard Flow (Other Airports or Joint-Kiosk Lanes Full)
Where Joint Kiosks aren't available, immigration and customs are still two separate stops — but you scan the same 2D code at both.
Immigration (passport control):
- Find the Visit Japan Web lane where available, or proceed through general immigration
- Scan your 2D code at the kiosk or show it to the officer
- The officer takes your photo and (for foreign nationals 16 and older) fingerprints
Customs (after baggage claim):
- Use the electronic customs declaration terminal if available
- Scan your passport and 2D code at the terminal
- Follow the on-screen instructions
- Depending on your declaration, you'll be directed to the e-Gate (no items to declare) or to the manned counter for inspection
Customs officers can still select you for a baggage inspection even after a successful e-Gate scan. The 2D code speeds up paperwork; it does not guarantee skipping a manual check.
Registering Family Members
If you're traveling with family, you can register multiple travelers under one account:
- From the home screen, tap "Register Traveler"
- Add each family member's passport details
- Complete the immigration and customs sections for each person
- Each traveler ends up with their own 2D code for arrival procedures
Children: Parents can register children under their account. Children under 16 don't need fingerprinting at immigration. Each traveler — including children — still needs their own 2D code, and at the Joint Kiosk or e-Gate each person typically scans separately.
Common Mistakes to Avoid
1. Name doesn't match passport Your name on Visit Japan Web must exactly match your passport — middle names, order (family name first vs. given name first), spelling. Check the Machine Readable Zone (the two lines at the bottom of your passport photo page) for the exact format.
2. Skipping the customs section Many travelers complete the immigration form but forget the customs declaration. The 2D code only includes both procedures when both sections are completed. If you skip customs, you'll be filling out a paper customs form at the airport.
3. Registering too late While you can technically complete it on airport WiFi after landing, this defeats the purpose. Do it at home where you can calmly look up your hotel address, flight details, and passport information.
4. Using a third-party paid service Visit Japan Web is 100% free. Some third-party sites charge money to "help" you register. You don't need them — this guide and the official site are all you need.
5. Not saving the 2D code offline Airport WiFi can be slow or unreliable. Screenshot your 2D code before boarding so you don't depend on connectivity right after landing.
6. Following an old guide that mentions blue/red QR codes Any guide that tells you to scan two separate QR codes is out of date. Since 2024-01-25 there is one unified 2D code for immigration and customs. The standalone Customs Declaration App that previously generated a separate code is no longer effective.
Pre-Arrival Checklist
Use this checklist to make sure you're ready before your flight. Aim to start at least a week ahead so you're not scrambling on departure day.
2+ weeks before departure
- ✅ Create your Visit Japan Web account at vjw.digital.go.jp
- ✅ Enter passport details — name exactly as printed on your passport
- ✅ Register every traveler in your party (each person needs their own 2D code)
1 week before departure
- ✅ Confirm flight number, arrival date, and arrival airport
- ✅ Enter your accommodation address and phone number
- ✅ Complete the Immigration / Disembarkation section
Day before / day of departure
- ✅ Complete the Customs declaration (separate section, same account)
- ✅ Verify the unified 2D code displays correctly
- ✅ Screenshot the 2D code to your photo library for offline access
On arrival in Japan
- ✅ Show the 2D code at the immigration kiosk (or to the officer)
- ✅ After baggage claim, scan the same 2D code at the customs e-Gate
- ✅ Keep your passport handy — both immigration and customs scan it alongside the 2D code
The 2D code is per-traveler, not per-trip. If you're traveling with family, each person — including children — needs their own code on arrival. The code is generated automatically once both sections are complete for that traveler.
Supported Airports (Electronic Customs Gates)
The electronic customs declaration gates (e-Gates) are available at seven international airports:
| Airport | IATA | City |
|---|---|---|
| Narita International | NRT | Tokyo |
| Haneda | HND | Tokyo |
| Kansai International | KIX | Osaka |
| Chubu Centrair | NGO | Nagoya |
| New Chitose | CTS | Sapporo |
| Fukuoka | FUK | Fukuoka |
| Naha | OKA | Okinawa |
Smaller regional airports may not have e-Gates yet — you'll present your 2D code (or paper form) at the manned counter instead. Major cruise terminals (Yokohama, Kobe, Fukuoka/Hakata, Naha) accept Visit Japan Web 2D codes for arrival.
Visit Japan Web vs. Old Systems
You might see references to "MySOS" or "Visit Japan Web (Fast Track)" online. Here's the simplified timeline:
- MySOS — used during COVID-19 for health screening. No longer exists.
- Visit Japan Web (Fast Track) — COVID-era feature for vaccine/test certificates. No longer required.
- Visit Japan Web (current, 2026) — handles immigration, customs, and tax-free shopping registration. Immigration and customs share a unified 2D code (since 2024-01-25); tax-free is a separate QR generated within the same account.
If you find guides online mentioning health declarations, vaccine uploads, or separate blue/red QR codes, they're outdated.
From November 1, 2026, Japan's tax-free shopping shifts from the current store-instant exemption to a refund-at-departure model. Make sure to check Japan Tax-Free Shopping Guide 2026 if your trip falls around or after that date — the Visit Japan Web tax-free QR feature is being adjusted for the new system.
After You Enter Japan
The next 60 seconds will set up the rest of your trip. Pick your next step:
Activate Your eSIM
Stop paying roaming fees the moment you land. Compare the top 5 eSIM providers and activate yours before takeoff.
Compare options →Get a Suica or PASMO
Japan's contactless train card. Buy one at the airport in 5 minutes — works for trains, buses, and vending machines.
Train guide →Check JR Pass Value
The JR Pass took a 70% price hike in 2023. Use our free calculator to see if it actually saves you money.
Run the calculator →Make Sure You're Covered
Japan has no free healthcare for tourists, and one ER visit can cost more than a whole policy. See what travel insurance you actually need.
Travel insurance guide →Or lock in the two essentials right now. Both take under a minute, and you can do them before you board.
Airport WiFi is slow and crowded right after a long flight — an eSIM activates the moment you land. These are the two we'd actually buy for a Japan trip:
In a hurry? Here's the short answer
The two eSIMs we'd actually pick for a Japan trip — install before you fly, switch on the moment you land. Full provider comparison in our eSIM guide.
Flexible plans, fair prices — solid pick for Tokyo / Osaka / Kyoto trips.
NTT Docomo + KDDI access and 5G. Pick this if you go beyond the big cities.
And don't fly uninsured. Japan has no free healthcare for tourists, and a single ER visit can cost more than an entire policy. SafetyWing is the flexible cover most travelers start with — a quote takes under a minute, and you can buy it even after you've already left home.
 Most flexible
SafetyWing Nomad Insurance
Flexible travel medical cover for your Japan trip
Flexible travel medical cover from around $62 per 4 weeks. Quote in under a minute, cancel anytime, and you can sign up even after you've already left home.
For everything else you need to know — from cash culture to train etiquette — read our comprehensive First Time in Japan guide.
Last verified: 2026-05-12. Primary sources: Visit Japan Web (Digital Agency), Unified 2D Code Announcement (2024-01-25), Japan Customs e-Gate, Joint Kiosk Pilot. Procedures can change without notice — verify with the official Visit Japan Web site before travel.